

Togliere le macchie di calcare dai vetri dell'auto senza graffiarli
Daniel von Detailing1 |


Koch-Chemie × COLOURLOCK
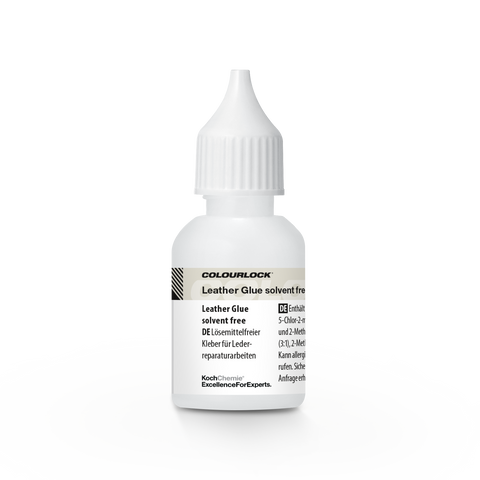
COLOURLOCK "Leather Glue" (Solvent Free) Colla senza solventi per riparazioni in pelle
Colla per pelle senza solventi, flessibile e forte
Koch-Chemie × COLOURLOCK
COLOURLOCK "Rep Glue" collante speciale per fissare piccoli danni
Colla speciale per riparazioni flessibili della pelle
What is COLOURLOCK leather glue? Specialized adhesive from professional leather repair, designed to permanently bond tears, lifted edges, and sub-surface backings while remaining elastic — COLOURLOCK "Leather Glue" (solvent-free) for surfaces and backing fabric, and COLOURLOCK "Rep Glue" with a brush for precise spot application.
COLOURLOCK leather glue represents the adhesive division of the repair line developed at the Lederzentrum since 1995 for saddlers and detailers, now operating under the umbrella of Koch-Chemie. These adhesives solve a task where every all-purpose glue fails: they must hold onto a material that stretches and contracts with every movement. That is why they dry transparently and remain permanently elastic instead of hardening into a stiff seam.
Practical tip from Detailing1: The most expensive mistake in leather gluing is a butt joint. Two torn edges are pushed together and glued; they look perfect in the evening—and tear open again exactly at the seam after a few weeks because the narrow glue line alone carries all the pulling force. For us, such inquiries almost always come from the driver-side bolster, where the entire body weight slides over the edge with every entry. The correct method is the detour: cut a piece of reinforcement fabric about one centimeter wider than the length of the tear, push it under the leather through the opening using blunt tweezers, smooth it out, and only then apply a very thin layer of glue between the fabric and the back of the leather. The tear is still visible afterward, but it holds.
A tear in a car seat is under tension every time you get in and out. An adhesive that cures glass-hard does not eliminate this tension; it merely shifts it to its own edge.
This is exactly where leather glue differs from all-purpose glue. COLOURLOCK formulations form a cohesive, stretchable film as they dry, which interlocks with the roughened fiber side of the leather instead of sitting on top like a layer of lacquer. In other words: the bond sits within the fiber, not on it. It moves with the seat instead of having to resist its movement.
In the inquiries we receive, the other path always reads the same: superglue applied, holds instantly and rock-solid, after two or three weeks the area is open again—this time next to the old glue line, because the rigid film cut into the soft fiber next to it. Contact adhesive from a hardware store tube creates a separate problem on synthetic leather: its solvents attack the plastic surface, leaving it dull and slightly sticky long before the bond itself fails.
Added to this are the conditions in the car, which almost no universal product takes into account. Behind the glass, it gets hot enough in summer for soft adhesives to start flowing; in winter, that same joint becomes brittle. Friction is a daily occurrence. A repair glue is therefore not judged by how firmly it holds on the first day, but whether it is still elastic after a thousand entries.
The two leather glues in the line share the work based on the type of application, not material thickness. Both come in a 20 ml bottle, and both remain flexible after drying.
COLOURLOCK "Leather Glue" (solvent-free) is the adhesive for surfaces and fabric. It is formulated without solvents, is practically odorless, and can be spread evenly on a backing fabric with a fine brush without the layer becoming thick. Its area of application: pre-gluing or backing tears and holes, re-attaching protruding leather edges, and laying down raised fibers.
COLOURLOCK "Rep Glue" comes in a brush-cap bottle and is therefore built for precision. The brush in the lid applies the glue exactly where a small piece of damage needs to be fixed—a lifted corner on the cover, a flaked-off piece of leather, or a patch that needs to stay put before filling. It penetrates the fiber well and stabilizes the area before filler and color are applied.
What both require is a substrate they can grip onto. This is usually present on the fiber side of the leather backing, but not on a detached visible edge: skin oils, care product residues, and silicones from cockpit sprays often sit there as a thin, water-repellent film. A water-based dispersion will bead up on this instead of soaking in. Therefore, degrease before gluing and let it dry completely; for smooth edges, additionally matt them with a fine pad—this cuts off protruding fibers and increases the surface area for the film to hold onto.
The practical rule behind this: surfaces and fabric need an adhesive that you can spread thinly and in a controlled manner. Spots and edges need one that stays exactly where you put it. If you only want to purchase one product, you are better off with the solvent-free version—the backing is the repair that decides whether it holds or re-tears, and it is the more demanding task.
Glue and needles solve two different types of damage. If the leather itself is intact and only the thread along the seam has come undone, the area should be stitched—if glued, it will not last a season.
The reason lies in geometry. A seam brings two pieces of leather together in a butt joint and distributes the tension over dozens of stitches across several centimeters. A glue joint in the same spot concentrates the same force on a millimeter-wide line in the seat crease—exactly where the leather folds every time you sit down. Saddlers repair such seams by hand using a saddler's stitch, often without removing the cover. For a driver's seat, this is a manageable position, and we explicitly recommend it instead of pulling glue into an open seam.
Glue is responsible as soon as the leather itself is damaged: a tear across the surface, a hole, an edge that has detached from the base plate, or a cover that has come off the glue fold. The preparation for a larger repair also involves it—a patch that will later be filled and colored must stay put first.
A seam also remains a special case during further processing. If the surface is recolored after the repair, seams and embossed logos should retain their original color instead of being painted over. For this, there is the Seam Protection Gel: it is applied to the thread before the color application, keeps the color off the seam, and is removed afterward. Contrast stitching in light-colored thread on dark leather would not survive a dyeing process otherwise.
The process is short, the errors lie in the dosage. Clean the surface and let it dry completely, cut the fabric to size, slide it under the leather, apply glue thinly, let it air-dry, and join with pressure.
“Very thin” is meant literally here. We deliberately exaggerated this on a test piece of thin nappa: applied generously, the glue migrates through the open pores to the surface and dries there as a dark, slightly shiny spot that can no longer be removed. Two lean passes cost less time than a spot that has to be dyed over afterward. Excess can be removed while wet with a damp cloth; as soon as the film sets, it becomes work.
Regarding drying time: depending on the layer thickness, about 30 to 120 minutes are realistic until the bond is ready to be handled, with full curing taking longer. The area is only load-bearing after that—and only then do filler, color, and top coat follow. Anyone who uses the seat before that pulls the fresh bond apart before it has reached its final strength. Both glues should also be stored frost-free and not in the sun; once frozen, a water-based dispersion cannot be saved.
Two more steps belong to this. Before the first surface application, test on an inconspicuous area whether the look or feel changes—the underside of the seat fold or the back of a headrest are sufficient for this. And for anything that goes wrong or is left over from an old repair, there is the Adhesive Remover, which also removes cured superglue residues from the surface before you start fresh.
One zone is off-limits, and it’s not about aesthetics. The predetermined breaking seams of the side airbags are located in the outer bolsters of many seats. If glued, stitched, or blocked with filler, their tearing behavior in an emergency is changed—these seams belong exclusively in a certified specialist workshop.
Perforated leather in air-conditioned seats is the second case. Glue runs into the hole matrix, swells the unprotected cut edges inside the hole, and clogs the perforation. We verified this on a removed seat cushion: the clogged holes were ultimately much more noticeable than the tear we were dealing with, and the seat ventilation was dead in that area. Open-pored aniline leather behaves just as unforgivingly—it soaks up the glue and darkens over a large area.
Structurally, DIY repair ends where not only the leather is torn. If the backing fabric under the entry bolster is gone and the foam underneath is broken, a backing repair has nothing to grab onto. A saddler replaces this segment. The same applies to large-scale gluing of entire covers over a base plate: these repair glues are not made for that; they are designed for tears, edges, and patches and do not replace contact adhesive for laminations.
And honest expectations are part of it. A glued and backed area holds, but it does not disappear. The tear remains visible as a fine line until it is filled, textured, and colored—and even then, you can recognize it under grazing light if you know where it was. Anyone expecting an invisible repair will be disappointed by any glue, regardless of the manufacturer.
Start with your finger, not the bottle. If the tear can be pulled apart and you see the backing fabric underneath, it is a case for backing with COLOURLOCK "Leather Glue" (solvent-free).
If, on the other hand, only an edge is lifting, a piece of leather is raising up, or a small patch needs to be fixed for the next work step, COLOURLOCK "Rep Glue" is the more direct path: apply the brush, place thinly, press down. If the thread has come undone and the leather is intact, no glue will help, but rather a needle or a saddler.
After gluing, the repair is not finished, it is load-bearing. What remains as a depression is closed by the fillers and putty in thin layers, followed by structure, color, and sealant. The preceding steps—degreasing, first re-greasing for brittle leather—and all other products in the line can be found one level up: Back to COLOURLOCK Repair.
Two material cases work slightly differently. Synthetic leather basically glues like leather but cannot tolerate solvent-based hardware store adhesives—here, the solvent-free one is the safe choice, and a pre-test on an inconspicuous area remains mandatory, as surface lacquers behave differently depending on the manufacturer. For bags, belts, and shoe upper leather, the same logic applies as in the car: tears and edges are a case for glue, a split seam on a loaded strap should be stitched, and the sole of a welted shoe is a matter for a shoemaker anyway.
The sentence that carries the entire category is at the end of the repair, not at the beginning: a bond does not hold because the glue is strong, but because there is no tension on it. Every minute you invest in the fabric under the leather is better invested than any additional drop on top of it.
Troppa scelta in Colla per pelle e riparazione cuciture di COLOURLOCK? Fatti aiutare a scegliere:
Daniel von Detailing1 |

Daniel von Detailing1 |

Daniel von Detailing1 |

Daniel von Detailing1 |

Jasper von Detailing1 |

Daniel von Detailing1 |

Daniel von Detailing1 |

Daniel von Detailing1 |

Jasper von Detailing1 |

Jasper von Detailing1 |

Daniel von Detailing1 |

Daniel von Detailing1 |