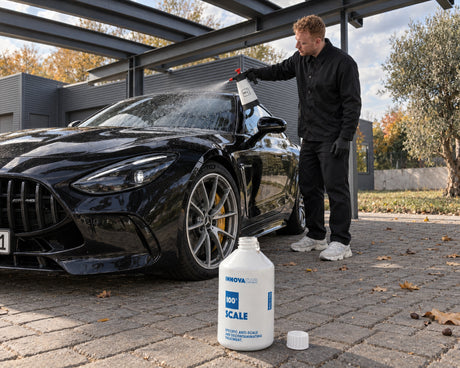
Togliere le macchie di calcare dai vetri dell'auto senza graffiarli
Daniel von Detailing1 |


Koch-Chemie × COLOURLOCK
COLOURLOCK "Stitch Covering Gel" gel protettivo per coprire cuciture e loghi durante la tintura
Gel protettivo per coprire le cuciture durante la colorazione
What is the Stitch Covering Gel by COLOURLOCK? The masking step before dyeing: COLOURLOCK "Stitch Covering Gel" encloses every thread in a temporary film, blocking dabbed dye and spray mist from the sides, and can be peeled off after dyeing. For contrast stitching, embroidery, and logos on vehicle leather, furniture, bags, and shoes.
Stitch Covering Gel by COLOURLOCK is the masking agent used in leather dyeing between the preparation phase and the first pigment application. COLOURLOCK "Stitch Covering Gel" is applied directly to the thread, dries into an elastic film, and encases the seam so that neither dye nor spray mist can reach it. After dyeing, you simply peel off the film, and the seam returns to its original color.
Practical tip from Detailing1: The most common mistake when using seam protection is applying the gel too widely. We keep receiving project photos where a narrow strip of the old color remains visible next to the light-colored seam because the film was applied beyond the thread and onto the leather, protecting that too. Therefore, work with a fine brush or precision nozzle and place the bead exactly on the thread. The second rule comes from the same issue: Let the film dry completely before applying dye. If you apply the first pigment too early, you will push the soft gel aside with a sponge or cloth, exposing the thread right where it should be protected. And always test on a hidden seam first.
You can dye a leather surface as often as you like. A light-colored thread in a seam, however, only forgives one mistake; after that, it is dark.
The reason lies in the material. Leather dye is a pigmented dispersion that is dabbed, rolled, or sprayed, and the sewing thread is a textile with an open capillary structure. It absorbs these pigments like blotting paper, and not just on the surface: the thread lies in a groove, its flanks are exposed, and the dye flows there automatically. Once the pigment has settled between the fibers, no cleaner can remove it.
What remains are three unpleasant options. Bleaching the threads is a gamble and stresses the surrounding leather. A saddler can resew it, but that costs more than the entire dyeing project itself. And the third method, which many describe in forums, is manual labor in the truest sense: dabbing the thread section by section with a fine brush until the contrast looks halfway decent.
What we at Detailing1 read in inquiries about failed dyeing attempts almost always sounds the same: The surface turned out uniform, but the car still looks "wrong." Contrast stitching is the detail that makes an interior look factory-fresh. If it disappears into the surrounding surface, the seat looks painted over, regardless of how cleanly the dye itself was applied.
COLOURLOCK "Stitch Covering Gel" is not a lid over the seam, but a shell around it.
Technically, this is a temporary masking film—a layer that is intentionally designed not to bond, but to be removed in one piece after the work is done. Think of it as a second skin that lies exclusively over the thread: the gel is flowable when applied, sinks into the groove of the seam, and wraps around the curvature of the thread before drying. This means there are no open flanks for the dye to enter from the side.
This is exactly where it differs from masking tape. Tape covers from above and has two edges, and liquid leather dye creeps under any edge it finds. Furthermore, on a seam, the surface under the tape is not flat. The tape bridges the groove instead of lying inside it, leaving behind the exact cavity you wanted to seal.
The second factor is spray mist. Large surfaces are dyed using a spray gun during restoration, and mist does not come vertically from above, but from all angles. A cover that only protects the top surface leaves the flanks of the thread exposed. The closed film blocks even fine mist because there is no side left where it could penetrate.
Finally, there is the behavior after dyeing. The film contains no hardening components; it remains elastic and can be peeled off as a cohesive layer. You will notice this when the seam is just as soft as before after removal, and the thread has neither absorbed dye nor retained any residual coating.
The sequence for leather dyeing is specified in the data sheet and is non-negotiable: clean, degrease, prime, fill, dye, finish with Top Coat, and adjust the finish using additives.
Seam protection belongs in the step after preparation is complete and before any pigment is involved. Before this comes cleaning and using a solvent-free degreaser, as a masking film will not adhere properly to skin oils and care residues and will shrink as it dries. The seam must be dry and matte when the gel is applied. This is followed by the leather dyes in several thin coats, finishing with the Top Coat, which is essentially the clear coat of the leather industry.
If you are not changing the color entirely but just refreshing a worn surface, use the color-neutral bases from the Leather Fresh series. This changes nothing for the seam: even a refresh involves pigment, and pigment will find the thread.
The film remains in place throughout the entire color application process and is only removed at the end. This has a consequence you should be aware of: what lies under the gel receives neither dye nor Top Coat. While this is the intended purpose for the thread, it would be a mistake for the leather right next to it. Therefore, the width of your application determines the result, not the quantity applied.
This sequence involves professional chemistry, not a hardware store spray kit, and it has the advantage that every step can be controlled individually. After degreasing, you check if the surface is matte. After drying, you check if the film covers the seam completely and has no tears. If you take these two checkpoints seriously, you have passed the tricky part before the first drop of dye falls.
Apply using a fine brush, precision nozzle, or spatula in a thin, continuous bead, exactly the width of the thread.
Practically speaking, this means: good lighting, a solid resting point for the edge of your hand, and working in sections rather than long strokes. For long, straight seams, a wafer-thin seam tape is the faster option, whereas the gel plays to its strengths where tape cannot reach: corners, curves, double seams, embroidered lettering on headrests, and logos. Many professional restorers combine both on a single seat.
Then comes the drying process. Air-drying takes up to six hours; with a hairdryer at around 130 °C, one to two minutes per section is enough. Only once the film has dried through can you dab, roll, or spray as usual. After dyeing, peel off the film; any stubborn residues can be removed with a slightly damp cloth.
Based on day-to-day work at Detailing1, times are easy to estimate: allow about half an hour of application time for the continuous stitching of a steering wheel, and perhaps an afternoon for the contrast seams of an entire seat bolster. Seam protection is therefore not the most expensive item in the project, but it is the one where haste is most immediately visible.
And one expectation upfront, so you don't despair at your own pace: you will be slow on the first meter of the seam, the bead will be uneven, and you will correct more than you'd like. That's part of the process. From the second seat onwards, your hand will follow the groove automatically, and your application time will be cut in half.
The gel protects an intact seam from dye. It does not fix a damaged one.
Burst seams, torn threads, and open stitches are a different matter and require leather glue and seam repair or the hands of a saddler. Anyone who glues over a loose seam before dyeing merely preserves the damage under the new color, and it will pop back up the next time someone sits down.
The strictest limitation is safety. Seat bolsters with side airbags have defined "weak points" in the stitching, which must burst exactly at that spot in an emergency. Neither masking film nor dye application must stiffen or glue these seams. If your vehicle has an airbag installed there, the area belongs to a saddler who can treat the seam professionally. This is not just a precautionary statement, but the point where a home project should reasonably end.
Two other points must be stated honestly. The gel is not a filler or a dye; it does not build up or cover anything. And it does not help with color matching: whether the new surface color matches the remaining original tone depends on the dye and its adjustment. Always expect a deviation with old leather, as years of UV light have shifted the original tone.
And one limitation stemming from preparation: test the material compatibility beforehand in a hidden area, both visually and by touch. Open-pored aniline and nubuck leathers absorb liquids unevenly, and a pattern we encounter again and again in project photos is exactly this: the application disappears into the fiber in one spot, while a few centimeters away it sits on top, and the edge between the two remains visible. These types of leather play by their own rules and are handled differently than pigmented smooth leather.
The answer is on your seat. If the thread and the surface are the same color, you don't need gel and can simply dye over everything.
Black on black is the standard in many vehicles, and the masking step is a waste of time there. The thread will absorb pigment that matches the tone it already had, and nobody will notice a difference later. It is part of being honest to say so, even though we carry the product in our range.
Conversely, seam protection determines the final result wherever contrast is part of the design: light-colored decorative stitching on a dark seat bolster, colored stitching on a steering wheel rim, embroidered lettering and logos on headrests or backrests, as well as furniture edges, bags, and shoes with dyed thread. For these cases, COLOURLOCK "Stitch Covering Gel" is available in a 20 ml bottle, dosed for precise work on the thread.
Those who prefer to buy the entire process as a coordinated kit rather than searching for every step individually can find it among the complete dyeing sets. The remaining additives used to adjust cross-linking, gloss levels, and feel are one level higher: Back to Additives & Auxiliaries from COLOURLOCK.
And the thought that carries the whole category: the thread is the only component in the interior that you cannot paint over or rework later when dyeing. The surface forgives a second pass; a layer that is too thick can be removed; a gloss level can be corrected. The seam forgives nothing, and that is why the impression of the finished seat is decided by a single millimeter of application width.
Troppa scelta in Gel protettivo cuciture di COLOURLOCK? Fatti aiutare a scegliere:
Daniel von Detailing1 |

Daniel von Detailing1 |

Daniel von Detailing1 |

Daniel von Detailing1 |

Jasper von Detailing1 |

Daniel von Detailing1 |

Daniel von Detailing1 |

Daniel von Detailing1 |

Jasper von Detailing1 |

Jasper von Detailing1 |

Daniel von Detailing1 |

Daniel von Detailing1 |