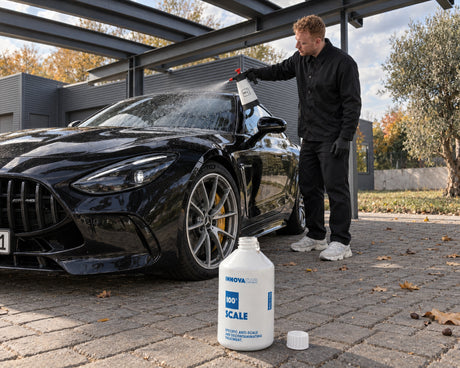


Togliere le macchie di calcare dai vetri dell'auto senza graffiarli
Daniel von Detailing1 |


Koch-Chemie × COLOURLOCK
COLOURLOCK "Leather Primer" promotore di adesione per fondo e colore della pelle
Primer per riparazioni pelle, la base perfetta per il colore
Koch-Chemie × COLOURLOCK
COLOURLOCK "Blocker" strato barriera contro le decolorazioni che riaffiorano
Barriera contro le macchie di colore sulla pelle
Koch-Chemie × COLOURLOCK
COLOURLOCK "Plastic Primer ND" primer per plastiche
Base perfetta per la verniciatura: primer di adesione per plastica
What are COLOURLOCK primers and adhesion promoters? These are the products used between degreasing and painting: an adhesion promoter that anchors leather paint to pigmented smooth leather, a primer for plastic interior parts, and a barrier layer that prevents old stains from bleeding through the fresh paint.
COLOURLOCK primers and adhesion promoters are the products that belong between the degreased surface and the first coat of paint. The adhesion promoter bonds leather paint and repair compounds to the leather's topcoat, the plastic primer makes smooth interior parts made of ABS, PVC, or PP coatable in the first place, and the barrier layer keeps dissolved dyes trapped in the substrate. None of the three products add color. All three determine how long the paint applied over them will last.
Pro tip from Detailing1: The most common reason for peeling leather paint is not a weak primer, but residual grease underneath. We regularly receive inquiries about seats where the fresh paint starts to lift at the entrance edge after only a few weeks, and almost always the surface was only cleaned and not degreased. After degreasing, perform the cloth test: pull a white microfiber cloth over the dry surface with light pressure. If a gray or oily haze remains on it, skin grease or old care products are still on the leather, and any primer will bond to this separating layer instead of the topcoat. Only when the cloth stays clean should you apply the primer—thinly, in overlapping passes, and allowed to flash off completely before the first coat of paint follows.
Leather paint does not adhere to a cleaned surface on its own; it needs a base that accepts it. That is exactly what the primer builds.
The fact that this has become its own product category has to do with the brand's origins. COLOURLOCK was founded in 1995 at the Lederzentrum and has been supplying saddlers and leather restorers for three decades—people who don't just make seats look better, but actually repair them. Today, the line belongs to Koch-Chemie from Unna, which is why it is listed in our shop under Koch-Chemie × COLOURLOCK.
In this environment, dyeing is not a superficial effect, but a build-up that must last for years. Anyone who recolors a seat bolster only to have it fail again after a summer ends up doing the work twice. Therefore, the effort is put where you don't see it later: degreasing, priming, thin coats, clean flashing off. The paint application itself is the easiest part of the chain.
A point that experienced users in forums emphasize time and again aligns with this logic: primer and paint should come from the same system. Binders, solvent base, and drying behavior are matched to each other when both are from the same manufacturer. If you combine a third-party adhesion promoter with COLOURLOCK paint, you leave the range for which both data sheets were written.
This also explains why these products are described in such sober terms. There is no instant effect to show, nothing that shines after application. An adhesion promoter only proves itself after the second summer, and until then, the only reliable information is the data sheet: substrate, application thickness, flash-off time, and what follows. The products are built precisely in this sequence.
The first question before dyeing is not which color you choose, but what you are applying it to. The category is structured along this divide.
The standard case is pigmented smooth leather: seat surfaces, bolsters, steering wheels, door panels. For this, there is the Leather Primer with the COLOURLOCK adhesion promoter. It stabilizes a surface that has become unevenly absorbent due to age, care, and wear, and provides a uniform base for color and repair products. It is available in 250 ml and 1000 ml / 1 liter sizes.
Plastic interior parts are the second case. Consoles, door handles, scuff plates, and trunk panels are made of ABS, PVC, or PP, and these surfaces are inherently smooth and difficult to wet. The COLOURLOCK Plastic Primer ND increases the surface tension—simply put: it makes the repellent surface receptive to liquids. As a result, the paint stays even instead of running together into islands.
The third case is not a substrate, but pre-existing damage. Where denim abrasion, nicotine, or an old repair is deep in the leather, the COLOURLOCK Blocker works: a thin, transparent isolation film that stops migration—i.e., the slow movement of dissolved dyes and oil residues from deeper layers to the surface.
In other words: the denim stain you just painstakingly removed from a beige seat won't reappear through the fresh paint half a year later. Indigo from denim bonds with the topcoat and, after prolonged exposure, sits deeper than cleaning can reach. For light-colored leather, the Blocker is the difference between a dye job and a dye job that lasts.
Both products are applied thinly, both dry transparently, and both are applied before the paint. Nevertheless, their functions are contradictory.
The adhesion promoter works upwards. Its binders interlock with the topcoat and remain elastic after drying—they move with the leather instead of forming a hard intermediate layer that would cause the paint layer to shear off. In practice, you notice this on the areas that move daily: the entrance edge and seat bolster are the first places where a rigid build-up will crack.
The Blocker works downwards. It does not seal like a topcoat but remains open enough for the subsequent paint to still grip. On critical surfaces, a second thin layer is more sensible than a thick first one—the barrier effect must be equally strong across the entire surface, otherwise, the exact gap will show through later.
On plastic, there is an additional effect that many only learn about after a failure: interior plastics release plasticizers over the years, which are the additives that keep the part flexible. If they migrate to the surface, they lift a coating from below, causing the paint to flake off in scales. This is precisely why a primer adapted for plastic is not an accessory there, but a requirement.
What none of these products can do is equally important. They do not color, they do not fill, they do not protect. The adhesion promoter makes no sense without subsequent paint, the Blocker does not replace a Top Coat, and neither turns an open crack into a closed surface. And on open-pored aniline, nubuck, or suede, neither has any place: there is no topcoat there in which they could anchor themselves.
For almost every care product, "thin" is considered economical. For primers, "thin" is the application instruction, and too much reverses the effect.
The reason lies in the structure. A thick primer layer dries on the outside first and traps residual moisture underneath. What remains is a soft intermediate layer, and the paint on top is only as strong as its weakest link. A film that you can barely see after it has flashed off therefore lasts longer than one that you can actually see.
The sequence in the coloring process is non-negotiable: clean, remove all residues with the degreaser, apply the barrier layer for problem leathers, prime, then apply the leather paint in several thin layers, and finally add the Top Coat and, if the feel or gloss level is not yet right, the appropriate additives. Every skipped step takes its revenge where the leather works the hardest.
Two general conditions play a role. Cold or damp surfaces significantly extend the flash-off time; heated seats in summer shorten it so much that the primer sets before you have finished the pass. Work in the shade at room temperature and wait for the matte, dry surface impression instead of watching the clock.
And when doing it for the first time, expect significantly more time than the data sheet suggests. A complete seat bolster including cleaning, degreasing, priming, and three coats of paint takes half a day; the second time, it takes two hours. The fact that the surface looks worse in between than it did before is part of the process and disappears with the paint.
When a recoloring job doesn't hold, it's rarely because of the adhesion promoter. It is almost always because of what was still on the surface underneath it.
Silicone-based care products are the classic culprit. They don't soak in; they sit on top, and they survive normal cleaning. We often see seats that have been treated with gloss sprays for years—that requires a complete degreasing pass before anything else happens. If the grease is deeper, for example, on headrests and in the middle of the seat, it is a case for the Grease Remover and not for more primer.
We tested the leather primer on a smooth plastic trim piece: it dries cleanly and looks good, but can be pulled off from the edge with a fingernail as a coherent film afterwards. On polymer surfaces, it simply finds nothing to interlock with. Conversely, the plastic primer does not belong on leather because it is designed for a completely different surface chemistry.
The universal primer from a spray can serves a different requirement, and to be honest: for a single plastic part that is painted and then hardly touched, it is often sufficient. On a surface that is gripped, stretched, and heated every day, however, the coordination between primer and paint is what counts—and you only get that within a system.
Two hard boundaries remain. Side bolsters with an airbag seam are not a DIY job: the seam must tear at the exact intended point in an emergency, and any additional layer of glue, filler, or paint in this seam changes this behavior. That belongs to the saddler. And the shade does not come from the primer, but from the paint: whether it matches is decided on a hidden test area in daylight, never on a screen.
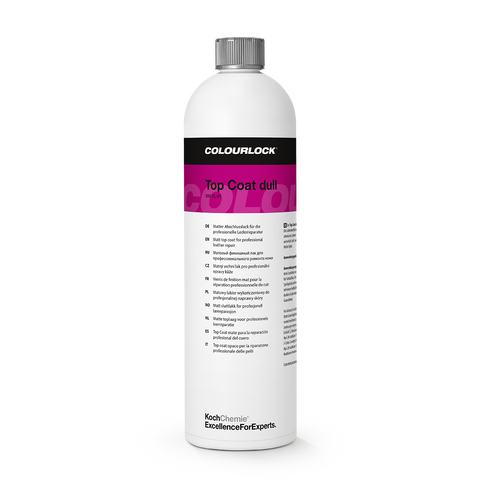
Start with the surface, not the product. Pigmented smooth leather with an intact topcoat gets the COLOURLOCK "Leather Primer," a plastic interior component gets the COLOURLOCK "Plastic Primer ND." For most projects, that is the entire decision.
After that, check the substrate for legacy issues. Light-colored leather with denim abrasion, a seat after nicotine exposure, or a surface that has already been dyed once are cases where the barrier layer is required before the adhesion promoter. If you are unsure, the simple rule from repair practice applies: better to block once than to dye twice.
And if none of the three cases apply, then priming is not your next step. Open-pored aniline, nubuck, or suede are excluded; a surface with an open crack needs glue and filler first; and leather that only looks dull and dry wants care, not dye. The primer requires an intact, closed topcoat—it does not create one.
Those who do not want to put the build-up together piece by piece will find cleaner, degreaser, paint, and finish perfectly matched in the complete dye kits. All other products in the coloring process are one level up: Back to Dyeing & Finish from COLOURLOCK.
And the thought that stands above the entire category: the primer is the only step in the coloring process that no one sees on the finished seat—and the only one that determines whether you will do the rest again in two years. From daily life at Detailing1, we know of almost no coloring job that failed because of the paint. The ones that failed are those where someone saved ten minutes on the primer.
Troppa scelta in Primer e aggrappanti di COLOURLOCK? Fatti aiutare a scegliere:
Daniel von Detailing1 |

Daniel von Detailing1 |

Daniel von Detailing1 |

Daniel von Detailing1 |

Jasper von Detailing1 |

Daniel von Detailing1 |

Daniel von Detailing1 |

Daniel von Detailing1 |

Jasper von Detailing1 |

Jasper von Detailing1 |

Daniel von Detailing1 |

Daniel von Detailing1 |