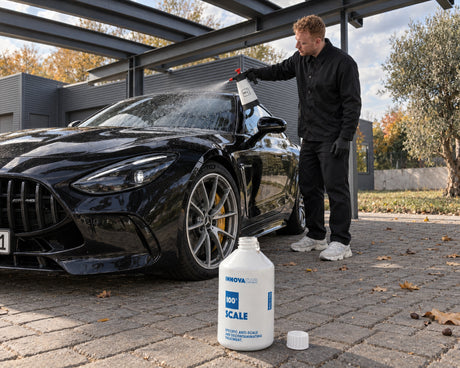
Togliere le macchie di calcare dai vetri dell'auto senza graffiarli
Daniel von Detailing1 |


Koch-Chemie × COLOURLOCK
COLOURLOCK "Plastic Primer ND" primer per plastiche
Base perfetta per la verniciatura: primer di adesione per plastica
What is COLOURLOCK Plastic Primer? An adhesion promoter for hard plastics in vehicle interiors: COLOURLOCK "Plastic Primer ND" applies a transparent adhesive film to trim, door handle recesses, and consoles, so that the leather dye adheres just as well as it does on the seat. Available in 250 ml and 1 liter sizes.
COLOURLOCK Plastic Primer is the intermediate step between degreased plastic and applying color. Hard plastic does not accept color well on its own: plasticizers migrate to the surface, care products leave behind silicone, and the surface is smooth and low-energy. COLOURLOCK "Plastic Primer ND" anchors itself exactly there, providing a base for the subsequent color to grip. It is thin, transparent, and does not clog the grain.
Pro-tip from Detailing1: We regularly receive inquiries about interior dye jobs that start peeling at the edges after a summer—and almost always, the problem wasn't the primer, but skipped degreasing. Interior parts have been treated with cockpit spray for years, and silicone oils soak into the surface rather than just sitting on top. Those who only sand and prime will just distribute the silicone across the freshly roughened surface. Therefore: first degrease thoroughly, then lightly sand to a matte finish with a fine sanding pad, degrease again, and remove the dust while dry. And perform the wipe test with a light-colored cloth—as long as color or greasy streaks remain on it, the surface is not ready for priming.
On leather, dye holds because the fibers absorb it. Hard plastic cannot do this: it is dense, smooth, and chemically inert, which is exactly why any coating fails without pretreatment.
The deciding factor is surface energy. This term describes how strongly a surface attracts a liquid. Plastics like ABS, PVC, or polypropylene are low in this regard, which is why paint pulls together on them like water on a freshly waxed hood instead of forming a uniform layer. You can tell: the first coat of paint looks patchy and runs back from the edges.
Added to this is a problem that only becomes visible after weeks. Plasticizers keep interior plastics flexible, and they are not permanently bound within the material—they slowly migrate to the surface. A paint layer without an adhesion promoter is hit by this migration from underneath, causing it to lift at the edges and flake off. This is the reason why paint on door sills and door pockets peels off after a few weeks, even though it was properly sanded beforehand.
The third opponent is self-inflicted. Years of cockpit care leave behind silicone oils that no all-purpose cleaner can completely remove. They are the most common reason why a dye job flakes off in exactly the spots that are touched the most: door handle recesses, the center console, or the shift lever trim. We see this regularly in vehicles that come to us after the first DIY attempt has gone wrong.
Whether a surface is suitable can be tested beforehand in ten minutes. Prime and color a palm-sized area in a concealed spot, let the system dry, and then pull off a piece of adhesive tape that has been firmly pressed on in one swift motion. If paint sticks to the tape, silicone or grease remains in the substrate, and the entire area must be degreased again. This test prevents exactly the damage that would otherwise only become visible on the finished part.
There is only one product in this category, and that is intentional: COLOURLOCK "Plastic Primer ND" covers the entire priming stage for hard plastic.
Technically, the primer works with polyether-modified trisiloxane as a wetting agent—a siloxane with water-friendly side chains that lowers the surface tension of the liquid enough so that it spreads across the inert plastic instead of beading up. In practice, this means: the primer also runs into the grain and corners where a normal coat of paint would leave gaps. Upon drying, a micro-fine, transparent adhesive matrix remains, to which the paint anchors itself.
The primer dries colorless. After it has flashed off, you cannot tell the surface has been treated—the texture remains, and nothing becomes glossy. This is not a cosmetic detail, but a requirement to ensure that a dyed panel does not look out of place next to undyed parts later on.
There is a simple rule of thumb for choosing the container size. The 250 ml is sufficient for individual parts: door handle recesses, trim, console frames, or a few plastic edges on a seat. The liter bottle is only worth it if you are doing complete door panels, dashboards, or multiple vehicles in succession. Frugality is part of the application anyway: primer should be applied thinly, otherwise it works against itself.
When applying, a spray gun is the cleanest method because it lays the film evenly over the grain without wiping it closed. Those working without spray equipment can also use a lint-free cloth or an applicator—apply in one direction without re-polishing so the fresh film is not torn open again. What counts in both cases is the edges: prime right up to joints, transitions, and backs, because that is exactly where the lifting will start later.
The priming stage from COLOURLOCK is divided by substrate, not by color. Anyone who confuses both primers loses the adhesion they were trying to build.
For the seat itself, the Leather Primer is responsible: COLOURLOCK "Leather Primer" bonds the leather substrate and leather dye, and COLOURLOCK "Blocker" prevents discolorations that would otherwise bleed through the new color. Both are designed for absorbent, flexible fibers. On hard plastic, they find nothing to anchor themselves to.
The same applies in reverse: COLOURLOCK "Plastic Primer ND" is tailored to polymer surfaces and has no place on leather. Both stages therefore live under the same roof—the category Primers & Adhesion Promoters—but work on different materials.
A third case is often miscategorized: soft faux leather and vegan leather. These materials usually do not need a primer at all if you add a crosslinker to the dye—COLOURLOCK "Crosslinker CD" makes the application mechanically robust without adding an extra layer underneath. If you only want to protect a faux leather surface instead of changing its color, the Artificial Leather Protector is the shorter path.
The classification is quickly made in everyday life: if the surface can be pressed in with your thumb and springs back, it is soft and belongs to the crosslinker path. If it remains hard and dimensionally stable, it is a case for the plastic primer.
The procedure is set and allows no shortcuts. Four steps, in this order, and every single one determines the adhesion of the entire dye job.
Step one is the Degreaser: COLOURLOCK "Degreaser" removes care product residues and hand oils from the surface. For parts that have been treated for years with silicone-containing cockpit spray, one pass is rarely enough—work until the cloth remains clean. Step two is roughening with a fine sanding pad: the surface should be uniformly matte, not scratched. Degrease again afterward, because material and grease are redistributed during sanding.
Step three is the primer. Apply thinly and evenly; a fine film is sufficient. Layers that are too thick worsen the adhesion instead of improving it—this is the point where most over-apply because they want to see the application. You shouldn't see it, and that's how it should be. Step four is the flash-off: let it dry briefly; in cool workshop temperatures, warm air from a hairdryer helps.
Then comes the color. The Color Refreshers from COLOURLOCK provide the neutral bases that are adjusted to the color of the leather seat; the Top Coat then sets the gloss level, and via the additives, you adjust the feel and matting so that the dyed trim does not stand out from the original part. Deep scratches or defects in the plastic must be addressed before priming: for this, there is the filler COLOURLOCK "Leather & Plastic Paste".
Expect to spend more time on the first part than you think. The preparation eats up most of it, but the actual primer application takes minutes. From the second part on, the ratio changes significantly because you know what "clean" means for this substrate.
Two conditions affect the result regardless of the technique: temperature and dust. Below about 15 degrees Celsius, the film becomes viscous and the paint above it does not flow as well; in a cold garage in winter, heating or rescheduling is worthwhile. And removed parts are easier to work on than installed ones—on the workbench, you can reach edges and backs; in the vehicle, you mask off and work overhead, with dust from the entire interior as a constant companion.
An adhesion promoter can only bond what is stable. It does not repair a surface, it does not replace cleaning, and it cannot hold paint that is too brittle for the location.
The most common disappointment arises at this very point. We have held interior parts where the primer was applied cleanly, yet the coating cracked—not because of the adhesion, but because a rigid paint was applied to a component that heats up and expands in the summer.
In the interior, the paint layer therefore needs elasticity; otherwise, the temperature will cause it to crack. This is exactly what determines whether a system works: the refresher base and top coat from COLOURLOCK are made for flexible substrates; a hard spray paint from a can is not. The best adhesion promoter in the world will hold onto paint that cracks on its own—it will just hold it in a cracked state.
We generally leave two areas alone. Airbag covers and their predetermined breaking lines are not coated—there, a defined tear seam determines how the component opens in an emergency, and an additional layer has no place in that calculation. The same applies to unstitched seat seams in the airbag area: that is upholstery work, not chemistry.
We also remain honest about the color. Neutral bases are colorless, and the tone is created by adjusting to the respective leather—and getting it right by "feel" practically never happens. Anyone coloring a visible surface next to an original seat works with a sample from a concealed area, not with the manufacturer's name of the color. A tone that is correct on the seat bolster may be off by a shade on the door panel because the light falls differently there.
Priming is worth it if the color of a plastic part is to be permanently changed. For everything else, there are shorter paths, and we say this openly.
The classic case for the primer: the seat is being re-dyed, and the plastic trim next to it retains its old, often faded tone. Then you prime the trim and re-dye it in the same color system instead of letting the vehicle stand with a color jump in the field of view. The same applies to vehicles that are being converted to a different interior color, and to plastic parts that must match the inventory again after a repair.
Not a case for the primer is a part that has only become dull and gray. If the surface is intact and only lacks color depth, a plastic care product is the more honest path: faster, reversible, without buildup. Dyeing is a one-way street—once it is coated, it will never be raw plastic again. You make this decision before the first sanding pad, not after.
If you decide on the buildup, the path leads via COLOURLOCK "Plastic Primer ND", and you will find the remaining stages one level up in Dyeing & Finishing by COLOURLOCK.
And the sentence that carries the whole stage: The primer is the only product in the dyeing process that you do not see in the finished result—and the only one whose absence you are guaranteed to see. Usually in the second summer, on the door handle recess.
Troppa scelta in Primer per plastica di COLOURLOCK? Fatti aiutare a scegliere:
Daniel von Detailing1 |

Daniel von Detailing1 |

Daniel von Detailing1 |

Daniel von Detailing1 |

Jasper von Detailing1 |

Daniel von Detailing1 |

Daniel von Detailing1 |

Daniel von Detailing1 |

Jasper von Detailing1 |

Jasper von Detailing1 |

Daniel von Detailing1 |

Daniel von Detailing1 |