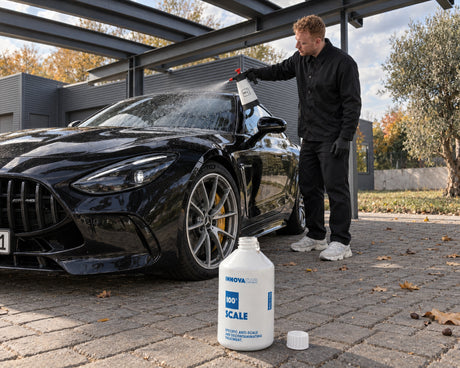


Togliere le macchie di calcare dai vetri dell'auto senza graffiarli
Daniel von Detailing1 |


Koch-Chemie × COLOURLOCK
COLOURLOCK "Binder" (Neutral) — riempitivo neutro per pelle fragile e screpolata
Primer neutro per preparare la pelle alla riparazione


Koch-Chemie × COLOURLOCK
COLOURLOCK "Leather Colour" tinta per pelle liscia pigmentata in superficie
Colore pelle all'acqua per pelle liscia in 32 tinte OEM
What are COLOURLOCK leather dyes? The opaque stage of the coloring process for pigmented smooth leather: COLOURLOCK "Leather Colour" water-based dye restores worn seats, bolsters, and steering wheels in 32 shades, while the neutral COLOURLOCK "Binder" acts as a load-bearing foundation to stabilize brittle leather underneath. Application follows the data sheet, not instinct.
COLOURLOCK leather dyes are coloring systems for the top layer of pigmented smooth leather — not for the hide beneath. They restore color to surfaces that have become dull and uneven due to denim abrasion, sun exposure, and skin oils. Two products share the work: the opaque COLOURLOCK "Leather Colour" for the visible color and the pigment-free COLOURLOCK "Binder" (Neutral) for the surface that must support the film of color.
Custom-fit original color for your vehicle: If you want your leather to look exactly as it did from the factory, choosing a standard color is a detour. COLOURLOCK mixes these same color systems based on original color samples for common car brands — you select the brand and shade directly, and the dye is mixed per order. Get started here: Original leather dyes by car brand.
Pro-tip from Detailing1: We regularly receive inquiries from customers whose steering wheel looked like it did before after only two weeks — and it is almost never the fault of the dye. It is because the surface was only clean before coloring, not free of grease. Skin oils, sunscreen, and care product residues form a separating film on which the color film merely sits rather than bonding. The test takes one minute: pull a white cloth soaked with degreaser across the surface in strips. As long as the cloth turns gray or yellow, grease is still present. Only when the cloth stays clean and the surface appears uniformly matte should you apply the first coat of color. And the second classic from the same inquiries: using brake cleaner as a supposedly thorough degreaser. It doesn't just strip the grease; it destroys the tanning in the fiber — after that, no color system from any manufacturer will hold on that spot.
At COLOURLOCK, a leather dye is not an individual product, but rather the fourth step in a fixed sequence — which is why it sits between the primer and the top coat on the shelf, rather than standing alone.
The brand was established in 1995 at the Lederzentrum and has been supplying saddlers, detailers, and smart-repair businesses for three decades. Anyone who spends their day building up cracked side bolsters and recoloring faded steering wheels does not work with a single bottle, but with a process: degrease, prime, fill, color, top coat, additives. Every product in the line occupies exactly one position within it. Since the acquisition by Koch-Chemie, the line has been in our shop as Koch-Chemie × COLOURLOCK — this logic remains unchanged.
For you, this has a practical consequence: the dye is not given a task that does not belong to it. It does not fill cracks, it does not replace a primer, and it does not seal itself. Instead, it performs its own part very precisely — a thin, elastic layer of color that traces the grain rather than clogging it. Products that promise to do everything at once generally provide a rubbery surface that feels like brushed-on paint.
In our daily life at Detailing1, we see how differently this category is used. One customer dyes a single driver's seat bolster on a lease return, the next restores the entire interior of a classic car, and a third does their steering wheel on a Saturday. Same two bottles, three completely different project sizes — which is why there is a small and a large container size next to every product in the line.
The two products in this category solve two different problems: one provides color, the other provides adhesion. Anyone who confuses them will be coloring on a substrate that cannot hold the color.
The opaque leather dye COLOURLOCK "Leather Colour" is the water-based polymer mixture for surface-dyed smooth leather with an intact pigment seal — in other words, for the standard case in a car. It dries into a thin, elastic color film that bonds with the existing top layer. Translation: not a rigid skin of paint on top, but a color bond that works with the material. Available in 32 shades and in 100 ml, 250 ml, and 1000 ml / 1 liter.
The filler dye COLOURLOCK "Binder" (Neutral) intentionally contains no pigment. Its flexible binding agents penetrate into the brittle top layer, cross-linking loose pigment particles and filling the micro-cracks that would otherwise become actual cracks. You can tell because the surface appears smoother and calmer afterward, without the color or gloss level having changed. It is the supporting base that ensures the dye covers evenly and does not blotch. Container sizes: 250 ml and 1000 ml / 1 liter.
The if-then logic is simple. If the surface is structurally sound and only looks dull and worn, Leather Colour alone is sufficient. If the leather on the seat bolster, steering wheel rim, or furniture edge is already rough, fibrous, or has micro-cracks, first apply the Binder in thin layers — and then the dye. And if your fingernail gets stuck in a real tear, both are still too early: then you first need a filler to compensate for the material loss.
The color code from the vehicle registration or equipment list names the shade your leather had when it left the factory — not the shade it has today.
Years of UV light lie between the factory color and the current state. The sun-exposed driver's side is regularly a shade lighter than the back seat in the same car, and beige, light gray, and sand-colored leathers shift the most significantly. Those who order by color code and dye a spot onto a faded surface will then see the very stain they wanted to remove — just in the opposite direction.
Therefore, there are two methods that work in practice. For the factory shade, the sure way is via the original color sample: with the original leather dyes by car brand, you select the brand and shade, and the dye is mixed per order — plan for more time than with in-stock items, but in return, the shade comes from the same database that detailers use. The second way is the standard palette: using a pipette, adjacent colors from the 32 shades of Leather Colour can be mixed until a test spot in an inconspicuous position — such as under the seat — matches. A quarter hour of testing and you save yourself the waiting time for a custom mix.
What applies in both cases: color from seam to seam, not just on the spot. The eye immediately recognizes an edge in the middle of a surface; a seam, by contrast, is already a dividing line. This is the most frequent question we receive before a purchase — and the honest answer is that finishing an entire seat surface is faster and looks better than three carefully retouched individual spots.
About 80 percent of the durability of a leather dye job happens before the first drop of dye touches the leather. The rest is patience during drying.
Step one is a pre-wash with a leather cleaner, step two is degreasing with the degreaser COLOURLOCK "Degreaser" until the surface is uniformly matte. Step three is the primer: the Leather Primer as an adhesion promoter on difficult surfaces, the Blocker as a barrier layer if discoloration could bleed through the new color, the Plastic Primer ND for plastic parts that need to be color-matched. Only after this do Binder or dye follow.
The color application itself is unspectacular and precisely that is why it is prone to errors. Apply the dye to a sponge, never directly to the leather, and dab it on in circular micro-movements — wafer-thin, without puddles. A steering wheel typically needs three to four layers, a heavily yellowed seat bolster four to six. Between each layer, use warm air on a medium setting for 5 to 10 minutes, followed by a short intermediate sanding with a 4000-grit leather sanding pad for about 30 seconds, and a microfiber wipe afterward. The processing temperature should be between 18 and 24 degrees Celsius; below 15 degrees, the dye does not bond reliably; above 30 degrees, the surface dries before it has been absorbed into the grain.
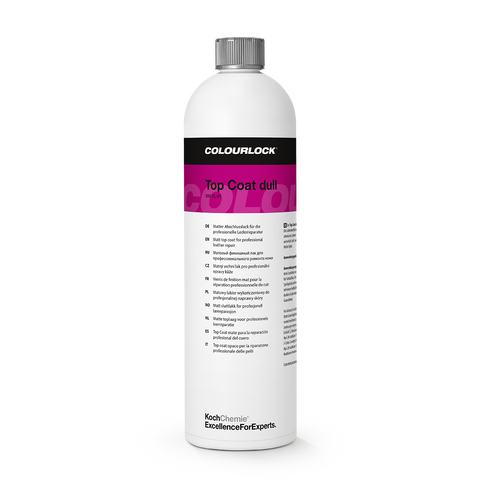
Finally, apply the Top Coat as a finishing lacquer — matte, satin, or high-gloss, depending on how the surface looked before. You can fine-tune the result using additives: the Crosslinker makes the dye and top coat more mechanically resistant, the Duller lowers the gloss level toward a factory look, Soft Slip and Wax Slip change the feel, and the Stitch Covering Gel hides seams and logos that should not get any color. Then comes the uncomfortable part: do not sit on it for about 30 hours. In practice, this means the car remains unused for two to three days — and anyone who respects this time will get a surface that withstands denim abrasion for years.
A leather dye is a precise tool for a narrowly defined substrate. Three limits determine before purchase whether this tool is even the right one.
The first limit is the type of leather. Leather Colour and Binder belong on pigmented, surface-dyed smooth leather and on pigmented artificial leather. Aniline leather without a pigment seal, nubuck, suede, and Alcantara are open-pored — there, the color film glues the fiber structure, the soft feel disappears, and the surface becomes stiff and plastic-like. A drop of water in an inconspicuous spot clarifies this in thirty seconds: if it soaks in and darkens the spot, dyeing is the wrong way — then the leather belongs in aniline leather care or requires the color refresher Nubuck Fresh, with an acceptance of the patina.
The second limit is structural. Seats with side airbags have a predetermined breaking seam that must tear open in a precisely defined way if triggered. Dye, Binder, and Top Coat stiffen the material locally — none of the three have any business being on this seam. Likewise, torn seams, detached covers, and worn-out upholstery with visible foam are not a job for dye, but for a saddler. We prefer to say this beforehand rather than afterward: anyone who coats over a crater will just have a smoothly painted crater afterward.
The third limit is the one we see too late most often. Customers contact us with surfaces that were "really thoroughly" degreased with brake cleaner, acetone, or spirits before dyeing. These solvents don't just remove the grease; they attack the tanning in the fiber. The substrate is permanently damaged afterward, and the polymer bond finds no more anchor — the dye peels off after days, regardless of which system is applied. A solvent-free degreaser is not a precautionary measure at this stage, but the only option.
And the honest durability limit: on normal seat surfaces and on furniture, a cleanly executed dye job lasts for years. On a steering wheel rim that is gripped daily, where hand sweat, rings, and watch straps constantly rub, the strain is in a different league — there, a touch-up after some time is part of the plan, not a product defect. The Crosslinker in the Top Coat pushes this point noticeably further back, but it does not eliminate it.
The fastest way to a decision involves two quick checks on the damaged area: run your fingernail over it once, and apply a drop of water once.
If the nail does not get caught anywhere and the drop beads up, your leather is pigmented and structurally intact — then the opaque leather dye COLOURLOCK "Leather Colour" alone is sufficient. If the surface feels rough, fine hairline cracks are visible, or the top layer is fraying in the grip zones, apply the neutral Binder first and the dye afterward. If your nail gets caught in a real tear, you first need a filler.
For those who just want to freshen up a surface that has become dull and tired without going through the full process, a lighter option is better: color refreshers based on Leather Fresh are the lighter answer for minor cases, and they require less preparation. This is not a stopgap solution, but often simply the right choice — dyeing is only worth it when color is genuinely missing. You can find all other components of the process one level up: Back to Dyeing & Finish.
And the thought that carries the whole category: a leather dye job almost never fails because of the dye. It fails because of the surface underneath and the 30 hours afterward. Anyone who takes both seriously will turn a seat that looked like it needed reupholstering into a surface that no one will recognize as a repair, using two bottles and one weekend.
Troppa scelta in Colori per pelle di COLOURLOCK? Fatti aiutare a scegliere:
Daniel von Detailing1 |

Daniel von Detailing1 |

Daniel von Detailing1 |

Daniel von Detailing1 |

Jasper von Detailing1 |

Daniel von Detailing1 |

Daniel von Detailing1 |

Daniel von Detailing1 |

Jasper von Detailing1 |

Jasper von Detailing1 |

Daniel von Detailing1 |

Daniel von Detailing1 |