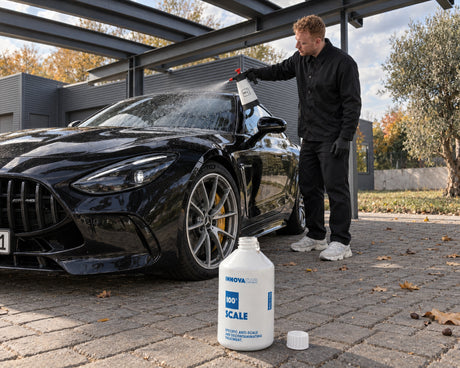
Togliere le macchie di calcare dai vetri dell'auto senza graffiarli
Daniel von Detailing1 |


Koch-Chemie × COLOURLOCK
COLOURLOCK "Leather Colour" tinta per pelle liscia pigmentata in superficie
Colore pelle all'acqua per pelle liscia in 32 tinte OEM
What is COLOURLOCK opaque leather dye? A water-based pigment dye for surface-dyed smooth leather: COLOURLOCK "Leather Colour" builds up a new, opaque layer of color in thin coats and cures into an elastic, abrasion-resistant film. Professional-grade chemistry based on data sheets, from steering wheel rims to complete seat sets.
Opaque leather dye is a pigment dye that applies a new layer of color to surface-dyed smooth leather instead of just refreshing an existing shade. COLOURLOCK "Leather Colour" is the standard range in this category: water-based, applied in thin layers by dabbing or spraying, and cured to form a soft film that withstands jean abrasion and hand perspiration. It is one link in a chain—degreasing, priming, filling, coloring, sealing—and every preceding link determines how long the color will last.
Professional tip from Detailing1: If leather dye rubs off the entry edge after just a few months, the cause is almost never the dye itself, but rather residual grease underneath. Skin oils, cleaning residues, and silicones are thickest exactly where the most stress occurs: side bolsters, steering wheel rims, armrests. Therefore, do not just clean, but degrease—until a white cloth no longer picks up any discoloration. Brake cleaner, acetone, and denatured alcohol have no place here, as they permanently destroy the leather fibers. And before applying the first layer to a visible area, test on a hidden spot, such as the back of the backrest. Two minutes of caution save you from a complete redo.
An opaque leather dye replaces the layer of color, whereas a color refresher only reinforces what is still present. This difference determines whether worn leather will look uniform afterward or remain patchy.
Surface-dyed smooth leather—the leather in almost every car—has an opaque pigment layer on the grain. It gives the leather its color, feel, and protection, and it is the part that disappears first. On entry edges, side bolsters, and steering wheel rims, it wears away over the years until the undyed leather core shows through. As long as the tone has only become dull, a color refresher is sufficient: It places a wafer-thin veil of pigment over the existing layer and balances out nuances.
If the pigment seal is worn through, this veil no longer helps. Then it is the substance that is missing, not just the nuance—and the task shifts from refreshing to rebuilding. This is exactly where COLOURLOCK "Leather Colour" comes in. It contains enough pigment to completely cover the old state in several thin layers, even if the surface underneath has become two-toned.
A third case goes one step deeper. If the surface is not only colorless but also brittle and cracked, a filler/filler dye is needed before the color. COLOURLOCK "Binder" is the neutral, elastic base for this: it seals fine cracks and gives the leather a load-bearing surface again. Dye applied directly to a cracked substrate will trace every crack instead of hiding it—after two weeks it will be visible again, only now in the new color.
We are regularly asked if the process can be shortened by simply applying a thicker layer. It cannot be shortened. A thick layer dries on the outside while remaining soft on the inside, becomes rough and rubbery, and can only be fixed with a fine sanding pad. The rule for everything that follows: better one more layer than one thicker layer.
Leather dye is pigment plus binder. The pigment provides the color, the binder holds it in place—and determines whether the film works with the surface or breaks.
COLOURLOCK "Leather Colour" is water-based. The color pigments float together with soft binder particles in a water phase; as it dries, the water evaporates, and the particles flow together into a coherent, stretchable film. This means for you: no solvent smell in a closed vehicle cabin, and a color layer that moves with the leather instead of sitting on top of it.
This flexibility is not a luxury for leather. A seat cushion deforms every time you sit down, a steering wheel rim is subjected to pressure and tension with every turn, and the side bolster crumples every time you slide over the edge. In leather dye, abrasion-resistant never means hard, but rather tough: the film must be able to stretch hundreds of times without forming fine cracks. A hard lacquer would crack on these same surfaces within one season.
For surfaces subject to permanent wear, this toughness can be increased. A crosslinker like COLOURLOCK "Crosslinker CD" chemically links the binder chains—turning individual threads into a net. Practically speaking: significantly higher mechanical load-bearing capacity on seat surfaces and steering wheels. The price for this is time, as mixed dye with crosslinker starts to set in the cup. Only mix as much as you can process in one pass.
Water-based also means temperature-sensitive during application. The dye binds reliably between approximately 18 and 24 degrees Celsius. Well below that, the binder particles do not flow together cleanly; well above that, the surface dries before the layer has had a chance to settle. A temperature-controlled workshop is not a luxury for this product, but part of the data sheet.
The durability of a leather dye job is decided before the dye is even applied. Anyone who shortens this chain won't get a worse result, but a short-lived one.
Step one is cleaning. A leather cleaner with a soft brush removes what is embedded in the grain—on heavily used seats, this is more than the surface suggests. Step two is degreasing with a degreaser like COLOURLOCK "Degreaser," which prepares the surface to accept the dye. Only a matte, absorbent, grease-free surface will accept pigment at all.
Step three is priming. The primer & adhesion promoter fulfills three different tasks: COLOURLOCK "Leather Primer" improves the connection between the leather substrate and the dye; COLOURLOCK "Blocker" blocks discolorations that would otherwise bleed through the new color—dark jean dye transfer on light leather is a classic example—and COLOURLOCK "Plastic Primer ND" primes plastic parts that are to be treated in the same tone.
Step four fills, step five dyes, step six seals. The Top Coat is not an optional glossy finish, but the wear layer over the dye: it absorbs the abrasion that would otherwise hit your pigment, and simultaneously determines the level of gloss—from a silk-matte factory look to high gloss. In our experience, this is the step that is most frequently skipped in DIY projects, and it is exactly what is missing later when the color gives up on the entry edge.
Step seven adjusts. The additives are the fine-tuners of the system: COLOURLOCK "Duller" reduces the gloss level infinitely; COLOURLOCK "Soft Slip" and COLOURLOCK "Wax Slip" determine whether the surface feels velvety or waxy; COLOURLOCK "Thickener" makes the dye stable enough for vertical surfaces. And the seam protection gel covers contrast stitching and logos so they retain their color while the area around them is being rebuilt.
The same dye supports two working methods: dabbed for an individual spot, sprayed for the entire interior. The difference lies in the tool, not the chemistry.
In the dabbing method, the dye is applied to a sponge, never directly to the leather, and applied in thin layers from seam to seam. Dabbed instead of wiped—that is the technique that determines the result and the need for rework, because wiping tears up the fresh layer and leaves streaks. Between layers, a heat gun dries the area, after which a very fine sanding pad smooths the semi-dried surface in a few seconds before the next layer is applied.
For entire seat sets, door panels, and complete interiors, professionals work with a spray gun in a cross-coat pattern, usually with a small dosage of crosslinker. The advantage is the uniform, thin layer thickness over large areas; the effort lies in the masking: everything that should not receive dye—seat belts, trim parts, seams, seat heating switches—must be taped off beforehand.
What both paths share is patience at the end. After the last layer, the dye film needs about 30 hours at room temperature before the surface is stressed again. Anyone who sits on it with light-colored trousers beforehand will tear up the previous day's work and press dye into the fabric. For a seat set, we therefore calculate in days rather than hours: one working day for preparation and build-up, one night plus one day for curing.
The scope ultimately determines the container size. For a steering wheel, an armrest, or a single bolster, 250 ml is enough with a reserve for a second attempt. Anyone tackling a complete interior should opt for the liter size—and mix a third shade from two standard tones if necessary, rather than starting the job with a tight amount.
Opaque leather dye can do a lot, but it cannot do two things: save the wrong substrate and guess a color tone. Both limits are known in advance.
The substrate decides first. Aniline leather, nubuck, suede, and velour are open-pored—there, an opaque dye clogs the surface and robs the leather of its feel and character. Bycast and pure artificial leather do not form a stable bond with the dye; the film will flake off after a short time.
The quick test is a drop of water on a hidden spot. If it beads up, the surface is closed and the dye is suitable. If it soaks in and darkens the spot, the leather needs conditioning, not dye.
The second limit is the tone. We regularly receive inquiries where a standard tone was ordered that matched on the screen but is two shades off on the seat—especially with grey tones that shift toward blue or green depending on the light. Aging also causes shifts: ten years of sun turn a factory tone into something else.
If your goal is the exact factory tone of your vehicle, the way forward is via Original Leather Dyes mixed according to an original color sample, rather than the standard palette. The standard dye shows its strength where you are completely changing colors, reworking a single area in black or tar black, or mixing your own tone.
Third limit: the seam on the airbag. Seat bolsters with integrated side airbags have a defined tear seam that must open to the millimeter in an emergency. Dye, filler, and adhesive in this seam alter its behavior, and that is not a result that can be verified after the fact. These seams belong to the upholsterer, who knows which seam is load-bearing and which is not—for everything else on that same bolster, the dyeing remains your job.
And an honest assessment of the effort: If you only want to refresh a dull but intact tone, you are faster, cheaper, and closer to the original with a color refresher. Opaque dye is the most complex stage of the dyeing process, and it is worth it exactly when substance is missing.
Three questions clarify the situation: Is the surface closed, is the color gone or just dull, and must the tone be exact?
If the surface is closed and the color is gone in individual spots—steering wheel rim, entry edge, bolster—COLOURLOCK "Leather Colour" is the right product. Fine cracks receive the filler dye beforehand, then the Top Coat is applied on top. If, on the other hand, the color has only become dull, you save yourself half the process and stick with the color refresher.
If the tone should exactly match the factory shade of your vehicle, the way forward is via original leather dyes based on a color sample. If you want to change colors freely, work in black or tar black, or add accents with metallic and fluorescent tones, the standard palette is the more direct route. You can find all other color levels of the brand one level up: Back to leather dyes from COLOURLOCK.
The sentence that ultimately decides the result has nothing to do with the dye: a leather dye job lasts as long as the preparation underneath holds up. The dye can cover any surface that you hand over to it clean, grease-free, and load-bearing—and none where you have cut corners on this part. That is why the most important step in dyeing is the one where no dye is involved at all.
Troppa scelta in Colore coprente per pelle di COLOURLOCK? Fatti aiutare a scegliere:
Daniel von Detailing1 |

Daniel von Detailing1 |

Daniel von Detailing1 |

Daniel von Detailing1 |

Jasper von Detailing1 |

Daniel von Detailing1 |

Daniel von Detailing1 |

Daniel von Detailing1 |

Jasper von Detailing1 |

Jasper von Detailing1 |

Daniel von Detailing1 |

Daniel von Detailing1 |