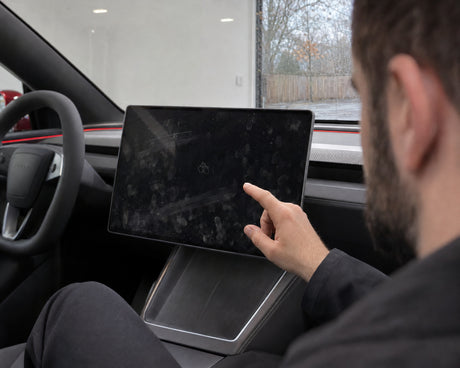
Clean a Tesla screen: what the Model Y touchscreen can take
Daniel von Detailing1 |


FLEX
"PE 2 18-EC" Cordless Rotary Polisher Ø150mm (18V)
Cordless professional rotary polisher for maximum paint correction


FLEX
"PE 2 14-EC C" Rotary Polisher Ø150mm
Professional Rotary Polisher for Maximum Paint Correction

Rupes
BigFoot "LH19E" Rotary Polisher Ø125mm
High-performance rotary polisher for professional car care
A rotary polisher needs a machine, pad and polish combination suited to the job. Compare attachment size, adjustable speed and power supply. What matters is being able to guide the chosen setup under control and assess the result on your paint reliably.
On a rotary polisher, the polishing pad turns around a central axis. Unlike a dual-action machine, it has no additional eccentric movement. The work therefore depends heavily on the attachment, polish and handling. Choose the machine for the specific paint task and accessible area; a high power rating alone does not show whether the complete setup suits your project.

Detailing1's tip from the shop: On the FLEX PE 2 18-EC, distinguish the no-load range of 550–1800 rpm from the trigger's starting speed. The separately stated 110 rpm describes that start-up. It is not a regular lower setting on the speed dial. For polishing itself, follow the specifications for the polish and attachment in use.
A rotary polisher works the paint with directly driven rotation, making the right combination of attachment, polish and handling especially important. The machine provides the drive. Whether a defect can sensibly be addressed also depends on the surface's condition and construction.
The outside edge of a rotating pad moves faster than the area near its centre. This changes the loading across the contact area. Tilting the attachment or working one spot without control changes that contact again. This method calls for attention to the surface, rather than relying solely on a steady-sounding motor.
A free-spinning dual-action polisher combines eccentric movement with additional plate rotation that friction can affect. On a forced-rotation dual-action polisher, that rotation is mechanically driven too. Both therefore differ from pure rotary action. For a fuller comparison of types, browse dual-action polishers; choosing one does not automatically protect against paint damage.
Define the result you want first. Are you addressing visible polishing marks, a particular paint defect or a finer gloss? The answer determines the combination you test on a suitable small area. A powerful machine does not make every deep scratch a defect that can sensibly be removed.
Do not confuse a smooth, shiny surface with approval to treat every material on the vehicle. The choice described here follows the specific paint task. Other surfaces have their own requirements. A successful combination on another vehicle can inform your choice, but it is not a binding instruction for your paint.
When comparing different drive types, keep the task the same. Heavy correction, access to a small area and a finely finished result are different goals. The main polishers category helps you place the machines accordingly. Only then is it worth comparing individual features within the suitable type. Our comparison of dual-action and rotary polishing explores the basic differences further.
The backing plate supports the polishing pad, but its diameter and the attachment size are different specifications that you must check together. For the FLEX PE 2 18-EC, the product page lists a maximum plate size of 150 mm. The manual limits the outside attachment diameter to 160 mm.
The M14 fitting here refers to the thread securing the attachment holder to the spindle. This is the mechanical connection between machine and plate. A matching thread alone is still not enough: the accessory must be intended for the specific machine so that dimensions, permitted speed and mounting all fit.
You cannot transfer a manufacturer's approval simply because another machine looks similar. The RUPES BigFoot "LH19E", for example, is described for different plate and attachment sizes from the FLEX PE 2 18-EC. Larger RUPES system dimensions are therefore no reason to use them on the FLEX. The manual for the machine actually in use remains the decisive limit.
Next assess the accessible area on the vehicle. A broad, open bonnet allows a different approach from a space between closely neighbouring parts. If the setup does not fit an area, that is no reason to force it in with the plate tilted. Choose an intended method and suitable attachment for such spots.
Pad shape and condition matter too. It must sit centrally and attach securely. A damaged edge, compromised fixing surface or noticeable imbalance cannot be offset by another machine setting. Check the actual combination before it touches the paint.
With polishing pads, the intended machine movement also matters. A system described for rotary use gives specific information about the pad and application; colour alone does not. Blue, yellow or black do not automatically mean the same correction stage across manufacturers. Read each description alongside the machine approval.

A cordless rotary polisher fits especially well into your kit when suitable batteries and a charger are available and you deliberately plan their use. The bare-tool version adds the machine to that power supply. If a necessary part is missing, the setup is not yet complete for first use.
Compare the machine alone with the FLEX "PE 2 18-EC" kit with battery and charger. The kit primarily answers the power-supply question. It does not change the basic polishing movement or replace the choice of suitable pads and polish.
Existing batteries are only an advantage if they genuinely match the intended system. The same voltage printed on a different brand does not establish compatibility. Check the charger too. This makes choosing a bare tool a considered addition to your equipment, rather than a later search for missing parts.
On vertical surfaces, you feel the complete setup in your hands. The chosen battery adds to the stated machine weight without a battery pack. Alongside the figures, consider the accessible grips and the posture the vehicle surface requires. Low bare-tool weight alone does not fully describe that practical setup.
A corded rotary polisher represents a different power-supply choice. You need suitable mains power and a workable cable route; with a cordless tool, you plan batteries and charging. Neither creates a universal ranking. What matters is which supply you can actually provide and organise sensibly for the work.
Do not expect a fixed number of fully polished vehicles per battery charge. Area, attachment and load change the workflow. A complete equipment list helps the buying decision more than such a runtime claim: machine, compatible power supply, approved plate, suitable pads, polish and a way to inspect the result thoroughly must all work together.
A rotary polisher's speed describes attachment revolutions per minute, but does not by itself provide the right setting for every paint and polish. It is one machine value within a complete system. Use the specific instructions for machine, attachment and chosen polish together.
On the FLEX PE 2 18-EC, you can preselect a speed and operate the trigger progressively. That describes how to control the tool; it does not make any particular setting a general recipe. Matching numbers on different machines or in someone else's video do not mean you are using the same combination with the same result.
A higher setting does not automatically solve an unsuitable-polish problem either. First check that the product is described for the intended movement and task. The polishes selection helps you identify the desired stage of work. The specified pad is part of that combination, not an interchangeable extra.
Make changes in a way you can trace. If you change pad, polish and setting simultaneously on a test area, you will struggle to identify what made the difference. Fully assess the chosen combination first. Then decide which component needs adjusting, rather than responding to every remaining mark with more speed.
When comparing machines, power consumption and battery voltage are different quantities too. You cannot directly set a corded tool's wattage against a battery's voltage. Intended working range, suitable attachments and controllable operation tell you more than a ranking made from such unlike figures.
Test methods illustrate this too: in their 2019 rotary-polisher comparison, AUTO BILD and GTÜ assessed handling, smooth running and speed stability as well as gloss. That historical comparison applies to the machines tested at the time. Its multi-part approach is useful when choosing; a test win cannot be transferred to another current model.

Before polishing, inspect the machine, mounting and attachment so that damage or an unsuitable combination is spotted before contact with paint. On the FLEX PE 2 18-EC, remove the battery before fitting or changing accessories. The same applies before cleaning the machine afterwards.
Fit the specified attachment holder according to the manual and use the spindle lock only when the machine is stationary. Secure the polishing attachment firmly and centrally. These straightforward preparation steps deserve care: a poorly seated pad changes how the tool runs. Check the parts and perform the prescribed test run before starting work.
Personal protective equipment is part of preparation, including the safety glasses FLEX requires and other equipment appropriate to the job. Arrange a workplace where you can guide the machine with both hands. Keep the necessary materials ready so you do not have to reach for accessories during use.
Pay particular attention to corners, edges and places where the attachment could catch. Such snagging can cause a sudden reaction from the machine. Hold it as instructed and work in an area you can control. Motor regulation does not replace that mechanical control or suitable attachment selection.
Do not transfer a general pressure figure or starting sequence from another polisher. Even within one brand, instructions can differ between machine types. The PE has its own manual, used alongside the specific polish instructions. A video can illustrate the grip, but does not reliably reveal the force actually applied to the surface.
Finish working before setting the tool down and wait until it has stopped completely. If you notice unusual vibration or other irregularities, investigate with the machine safely stopped. Simply continuing or increasing pressure is no substitute for addressing a damaged pad, insecure mounting or unsuitable combination.
After polishing, remove residues as the polish manufacturer instructs and inspect the area under suitable lighting before deciding on further work. An evenly glossy view from a single angle is not always enough. Look at the treated area so that remaining fine marks are visible too.
Holograms are fine polishing marks that can show under certain lighting. Assessing them is part of judging the finished result, beyond the broad impression during work. If you see them, examine the combination and technique specifically. Another unchanged pass is not an automatic answer to every visible irregularity.
Pad inspection matters just as much. Look beyond the visible surface to changes in running behaviour and signs of damage. FLEX's manual mentions wear within the foam core that may not be visible externally. Inspect or replace a suspect attachment rather than using it until it visibly falls apart.
Keep different polishing compounds separate by using dedicated pads, as the machine manual instructs. This keeps the chosen combination traceable. Clean pads according to their own manufacturers' instructions; a universal washing temperature for every foam, wool pad and fixing would not be reliable guidance. Do not carry residues from one polishing stage into the next without checking them.
Remove the battery before machine maintenance. FLEX's manual describes cleaning the ventilation areas and removed dust filter with dry compressed air. This is separate from cleaning the polishing pad. Follow the individual instructions for machine, attachment and consumables, so a blanket cleaning routine does not lead to unsuitable treatment.
At the end, inspection determines the next step. Once residues are removed and the result assessed under suitable light, you can plan further paint care deliberately. If a mark remains, identify it and the limits of the chosen combination first. Good organisation also means having a reason to skip another polishing pass, rather than repeating it automatically as a precaution.

Too much choice in Rotary polishers? Get help picking:
Add Detailing1 as a preferred source on GoogleA rotary polisher drives the pad around a central axis. Unlike a dual-action machine, there is no additional eccentric movement. Attachment, polish and handling together determine the work. Choose the combination for the paint condition and task, and inspect the result carefully; the drive alone does not guarantee complete defect removal.
First compare the accessible vehicle areas, suitable attachments and your power supply. The bare-tool FLEX "PE 2 18-EC" complements an existing suitable FLEX 18 V system; a kit with battery and charger completes the power supply. Check plates, pads and polish too. A kit description does not automatically mean that all consumables are included.
Look for clear instructions, approved accessories and a size you can guide under control on your vehicle. A rotary machine requires deliberate handling and careful inspection. Compare dual-action operation too. No machine type replaces learning to use it, choosing a suitable test area and following the specific manufacturer's instructions.
The right type depends on the task, experience and matched attachments. Rotary action turns the pad around a central axis; dual-action machines combine movements. On a forced-rotation dual-action tool, rotation is mechanically driven too. Compare the actual method rather than a blanket ranking. Even a free-spinning dual-action polisher does not automatically prevent paint damage.
There is no universal setting for all paints, pads and polishes. Follow the specific manufacturers' instructions and test the combination. The FLEX "PE 2 18-EC" has a regular no-load range of 550–1800 rpm; the separately stated 110 rpm describes trigger start-up. The maximum machine speed is not a general polishing recommendation.
Use a polish and intact pad combination suited to the paint and machine movement. Keep different compounds on separate pads and assess the work on a test area. Remove residues as instructed and inspect under suitable lighting. A fixed speed, pad colour or extra passes do not guarantee a hologram-free finish.
This process applies to the FLEX "PE 2 18-EC" with approved accessories. It supplements the full machine manual and the instructions for the specific polish.
Choose a polish suited to the paint task and an attachment intended for the FLEX PE 2 18-EC. Follow machine, accessory and polish instructions. Prepare a suitable test area, inspection lighting and the prescribed protective equipment.
Remove the battery. Check the attachment holder and pad for damage and secure mounting. Fit the specified plate as instructed; use the spindle lock only when the machine is stationary. Secure the attachment centrally and firmly. Use separate pads for different compounds.
Insert a compatible battery and perform the test run prescribed in the machine manual. Stop using damaged attachments or those with unusual vibration. Choose the setting according to machine, attachment and polish instructions. The highest machine speed is not a general polishing recipe.
Follow the specific polish's application method and sequence. Guide the PE 2 18-EC with both hands according to its own manual. Watch edges and places where the attachment could catch or snag. Do not transfer pressure figures or starting sequences from another machine type.
Switch off the machine and wait until it has stopped completely before putting it down. Remove polish residues as instructed and inspect the treated area under suitable light. Use the result to decide whether the combination fits or needs a targeted adjustment.
Remove the battery before accessory changes and cleaning. Check pad and mounting, clean the pad according to its own instructions and replace damaged attachments. Clean ventilation areas and the removed dust filter with dry compressed air as FLEX instructs. Continue keeping different compounds and pads separate.
Daniel von Detailing1 |

Daniel von Detailing1 |

Daniel von Detailing1 |

Daniel von Detailing1 |

Daniel von Detailing1 |


Daniel von Detailing1 |

Daniel von Detailing1 |

Daniel von Detailing1 |

Daniel von Detailing1 |

Daniel von Detailing1 |

Daniel von Detailing1 |